Sunday, November 29, 2009

Chocolate Banana Almond Muffins

Chocolate Banana Almond Muffins
4 points each (see note below on how to reduce points)

We had several bananas getting really dark that were just begging to be baked into something. So my little sous chef and I decided to make banana muffins for breakfast this morning. I used the banana variation of the basic muffin recipe in my Better Homes and Gardens Cookbook. And of course I "hollified" it as well.

Ingredients

  • 1 cup white flour
  • 3/4 cup rolled oats
  • 1/4 cup flax seed meal (can be omitted)
  • 2 tsp baking powder
  • 1/4 tsp salt
  • 1 beaten egg
  • 1/2 cup 2% milk
  • 2 mashed bananas
  • 1/2 cup chopped almonds (or other type of nut)
  • 1/2 cup chocolate chips

Directions

  • Preheat oven to 400 and spray muffin pan
  • In mixing bowl, combine flour, oats, flax seed meal, powder and salt
  • Add egg, bananas, milk, almonds and chocolate chips. Mix until just combined.
  • Divide batter into muffin pan
  • Bake in 400 degree oven for 18 - 20 minutes
  • Muffins are done when toothpick inserted into the center comes out clean

Notes: The original recipe calls for 1/3 cup of sugar, which I actually intended to add, but I forgot about it. The muffins were plenty sweet with the banana and the chocolate chips though. They could have used a tiny bit more sugar; perhaps 2 tablespoons. Also, the original recipe calls for 1/4 cup cooking oil, which I (intentionally) omitted.

To reduce points:

  • Omit almonds, 3 points each muffin
  • Omit chocolate chips, 2.5 points each muffin
  • Omit both almonds and chocolate chips, 2 points each (1.75 points, really)
  • Reduce almonds by half, 3.5 points each
  • Reduce chocolate chips by half, 3 points each
  • Reduce both almonds and chocolate chips by half, 3 points each (2.75 points, really)

Labels: , , , , ,

Tuesday, November 17, 2009

Vegetarian Tortilla Soup


Vegetarian Tortilla Soup
2 points per 1 cup serving
My newest obsession is Qdoba's Vegetarian Mexican Gumbo and this Tortilla Soup is part of my recreation of it. This recipe is just for the soup, and at the end, I will tell you how I put it together w/ other ingredients to make my own Mexican Gumbo. This soup recipe is based on one I found at allrecipes.com.
Ingredients
  • 1 Tbl olive oil
  • 1 lb. package of frozen Grilled Pepper Blend (I found these at Target - Archer Farms brand)
  • 1/2 medium onion, chopped
  • 2 garlic cloves, minced
  • 3 Tbl ground cumin
  • 28 oz can crushed tomatoes
  • 1 small can chopped green chile peppers (Use more or less to taste. I actually like things very spicy, but I only added about 3/4 can so it wouldn't be too spicy for my 3 year old. I would have liked at least 2 cans for my own taste.)
  • 4 tsp Better Than Bouillon Vegetable Base (or 4 vegetarian bouillon cubes or 4 cups of vegetarian broth).
  • 4 cups water (if using broth, eliminate water!)
  • 11 oz can of whole kernel corn (I used Green Giant Mexicorn)

Directions

  • Heat olive oil in large pot
  • Add onion, garlic and frozen pepper blend and saute until vegetables are tender
  • Add crushed tomatoes, cumin, chile peppers, bouillon and water and bring to a boil.
  • Lower heat and simmer about 20 minutes.
  • Add corn and simmer another 5 minutes.

To make Mexican Gumbo, add 1/2 cup cooked brown rice, 1/2 cup cooked black beans to a bowl, then add 1 cup of Tortilla Soup. Top with shredded cheese, sour cream, chopped cilantro, lime juice, avocado or guacamole, tortilla chips and/or whatever else you can imagine!! Obviously, all of these things add to the points value; but it makes for a very filling main dish!!


Labels: , ,

Monday, November 16, 2009

Oat Dinner Muffins


Oat Dinner Muffins
Guessing at 2-3 points each

I came up with this recipe so that I'd have a quick, whole grain bread to eat with beans, soups, etc. Cornbread is really tasty, but since the corn is degerminated in the milling process, it is not a whole grain.


I majorly modified a basic muffin recipe from my trusty ol' Better Homes And Gardens Cook Book and came up with these sweet, delicious, whole grain dinner muffins. I completely eliminated cooking oil from the recipe to make it lower in fat and you can't even tell.

Ingredients:


  • 1 cup white flour

  • 3/4 cup rolled oats

  • 1/4 cup flax seed meal

  • 1/4 cup sugar (though, I think I will use a bit less next time)

  • 2 tsp baking powder

  • 1/4 tsp salt

  • 1 beaten egg

  • 3/4 cup milk


Directions:


  • Spray muffin pan or line with paper baking cups.

  • Preheat oven to 400.

  • In medium bowl, combine flour, oats, flax seed meal, sugar, baking powder and salt. Make a well in the center of flour mixture.

  • In another bowl, combine egg and milk.

  • Add egg mixture to flour mixture and stir until just moistened (batter should be lumpy).

  • Spoon batter into muffin pan. I used a 1/4 measuring cup and it only made 8 muffins vs. the 12 the original recipe stated it would yield.

  • Sprinkle dry rolled oats on the top of muffin batter.

  • Bake in 400 degree oven for about 20 minutes until a wooden toothpick inserted in centers come out clean.

Labels: ,

Tuesday, October 20, 2009

Sweet Cornbread

Sweet (but not TOO sweet) Cornbread
I still need to determine points, but I'm guessing about 3 points per 1/8 piepan slice

I recently found a brand of baking flours and cornmeals called Shawnee Best. I like using local foods/companies so I was excited to buy it!

This recipe comes off of the back of the Shawnee Best Yellow Corn Meal package. I meant to make the Homestead Corn Meal Muffins - there is a different recipe for muffins vs. cornbread on the package - but I realized too late that I was out of muffin liners, so I used a pie pan instead.

Ingredients:

  • 1/3 cup yellow corn meal
  • 3/4 cup all purpose flour
  • 1/2 sugar
  • 3/4 teaspoon salt
  • 2 teaspoons baking powder
  • 2 Tablespoons olive oil (original recipe called for 3 Tablespoons vegetable oil)
  • 1 egg
  • 1/2 cup milk (I used soy milk b/c we have some to use up and Robin doesn't like it)

Directions:

  • Preheat oven to 400 degrees.
  • Lightly grease bottom of pie pan with butter.
  • Mix together cornmeal, flour, sugar, salt, and baking powder.
  • Add oil, egg and milk and stir until dry ingredients are just moistened.
  • Fill pie pan with batter and bake approximately 15 minutes. It is done with a toothpick inserted into center of the bread comes out clean.

I still need to determine points, but I'm guessing about 3 points per 1/8 piepan slice.

Labels: , , ,

Tuesday, September 29, 2009

Oatmeal flax seed meal muffins (a.k.a. Meal in a Muffin)

Oatmeal Flax Muffins (a.k.a. Meal in a Muffin)
Plus a little lesson about flax seeds and flax meal. Bonus!
Yield: 21 muffins; 3 points each muffin

I call these "Meal in a Muffin" because they include all of the food groups, including chocolate!!


I adapted these muffins from the Bran Flax Muffin recipe on the back of Bob's Red Mill Organic Flax Seed Meal package. Flax seed meal is really just flax seeds that are ground up very finely. I tried making my own flax seed meal a while back from whole flax seeds with no success. I ran some whole flax seeds in my food processor for a very long time and wound up with really scraped up, but still whole, seeds.


Why the flax seed meal? Why not just eat the seeds whole? Well, flax seeds are very good for you (see the product details section of the Flax Seed Meal link above), but if eaten whole, they pass straight through without being digested. So their benefits are literally being flushed down the toilet. The meal is digested by your body and you can reap the great benefits of these wonderful tiny brown seeds. Ok, ok... now on to the receipe!


Ingredients:
  • 1 1/2 cups white flour (Bob calls for whole wheat, but I think it might make the muffins too dense)
  • 3/4 cup flax seed meal
  • 3/4 cup rolled oats (Bob calls for oat bran cereal, but rolled oats work just as well)
  • 1/2 cup sugar (Bob calls for 1 full cup of brown sugar)
  • 2 tsp baking soda
  • 1 tsp baking powder
  • 1/2 tsp salt
  • 2 tsp ground cinnamon
  • 3 medium/large carrots, shredded (I use the food processor's shredding blade for ease)
  • 2 medium apples, cored and shredded (Again, I use the food processor. Bob's recipe calls for the apples to be peeled, but I don't do that. It takes too much time and the peel of the apple has a lot of good nutrients that I don't want to miss out on!)
  • 1/2 cup baking chocolate chips (I use these in place of the 1 cup of raisins)
  • 3/4 cup chopped almonds (Bob calls for 1 full cup)
  • 1/2 cup low fat vanilla yogurt (Bob calls for 3/4 cup of milk, but I like using yogurt for some of the milk)
  • 1/4 cup 2% milk
  • 2 large eggs, beaten (though if using a KitchenAid mixer, you don't need to pre-beat the eggs).
  • 1 tsp vanilla

Directions

  • Mix together flour, Bob's Red Mill Flaxseed Meal, oat meal, sugar, baking soda, baking powder, salt and cinnamon in a large bowl.
  • Stir in carrots, apples, chocolate chips and nuts.
  • Add yogurt, milk, eggs and vanilla.
  • Mix until ingredients are moistened. DO NOT OVER MIX.
  • Fill muffin cups using a 1/4 cup measuring cup.
  • For a gourmet look, sprinkle the tops of the muffins with a small amount of dry rolled oats.
  • Bake at 350 degrees F for 15-20 minutes.
  • Yields 21 muffins (Bob's recipe reads that it yields 15. I don't think I fill the muffin cups as full as Bob does.)

Labels: , , ,

Friday, September 25, 2009

Chocolate-Coconut-Flax Seed Meal covered pretzels


OK so this these FAR from nutritious, but very delicious. I wanted to make a chocolaty snack for a road trip and just made this up on the fly.

Ingredients:
  • 48 Snyder's Pretzel Snaps (obviously you can use any type of pretzel)
  • 3/4 cup of Nestle semi-sweet chocolate morsels
  • 1 Tbs 1% milk
  • shredded coconut - not much, maybe 2 Tbs?
  • flax seed meal - again not much... maybe 1 - 2 Tbs?

Directions:

  • Melt chocolate in sauce pan over low heat, stirring continuously to prevent sticking and burning.
  • Add milk and mix thoroughly.
  • Add pretzels and stir to coat. They will NOT coat completely.
  • Spread pretzels out onto a wax-paper covered cookie sheet. You might need to sort of reallocate chocolate from pretzels with a lot of chocolate to pretzels with not so much. Sort of like a culinary Robin Hood. Green hat and tights optional. ;)
  • Sprinkle coconut and flax seed meal over the pretzels*
  • Place in freezer until cooled. I left them in overnight, then put them in a bread bag (trying to reuse stuff more often!)

*One thing I would change is to add the coconut and flax seed meal to the chocolate while it's still in the saucepan, before adding the pretzels. Even though I sprinkled these on while the chocolate was still hot, most of the coconut fell off after I placed the pretzels in the bag. Even so, these are VERY delicious. Nice balance of sweet, salty and crunchy!! (And by adding the flax seed meal I feel like they are somewhat healthier!!)

Labels: , , ,

Thursday, September 17, 2009

Curried Lentils

This is one my my new favorite recipes to make. It is super easy, low in points and SO delicious! I could eat this every day. This can be made in the crock pot or on the stove.

Ingredients
  • 1 cup of dry red lentils, rinsed
  • 1 cup of dry green lentils, rinsed
  • 4 cups of vegetable broth (I use "Better than Bullion" to make the broth)
  • 2 medium potatoes, cubed
  • 1 - 2 red bell pepper, diced (I've also added chopped carrots to the recipe.)
  • 1 Tbs curry powder (or to taste)
  • 1 1/2 cups of water
Directions
  • Add all ingredients to pot (for the stove) or crock pot (if using slow cooker)
  • Stir to mix thoroughly
  • If using a slow cooker, cook on high for about 3 or 4 hours. DONE!
  • If using the stove, bring to a boil, then lower heat. Simmer for 30 minutes to an hour until done. Stir occasionally to prevent sticking.
  • Add more water during cooking if needed.
This is very good served over brown rice or all alone. This recipe has been a HUGE hit with anyone who has tasted it!

4 points for 1 cup.

Labels: , , , ,

Sunday, August 16, 2009

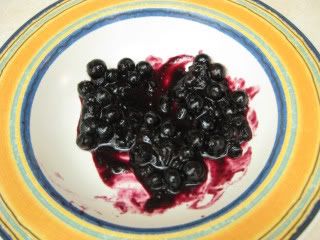
Blueberry compote


Blueberry Compote
1 point per serving

Ingredients:
  • 1/2 cup fresh blueberries
  • 1 tsp raw honey (you can substitute sugar)
  • 1 Tbs water
Directions:
  • Add half of the blueberries (1/4 cup), the honey, and the water to a sauce pan and stir.
  • Cook over medium high heat, while constantly stirring.
  • When the blueberries have burst and the sauce is a deep purple, add the last half of the blueberries.
  • Continue stirring the sauce until the blueberries have cooked, just a few more minutes.
This yields one serving, but it can very easily be doubled (or more) if you are cooking for one person. I put this on French Toast and it was delicious!

Labels: , ,

Tuesday, July 28, 2009

Easier Enchilada Sauce

I've developed an easier version my enchilada sauce, which originally appeared here: http://chefholly.blogspot.com/2006/06/vegetarian-black-bean-enchiladas-about.html.

And this is a variation of my original enchilada recipe: http://chefholly.blogspot.com/2007/07/variation-of-black-bean-enchiladas.html.

This sauce does not require a batch of freshly made salsa, but it tastes just as good! Here's how I make it.

Ingredients:

  • 2 cups of canned crushed tomatoes
  • 1 cup of water
  • 2-3 Tbs chili powder (or to taste)
  • 2-3 tsp ground cumin (or to taste)
  • 1-2 tsp garlic powder (or to taste)
  • 1 Tbs dried oregano leaf (or to taste)
Directions:
  • Place all ingredients into sauce pan and stir to mix completely.
  • Taste. Add more spices if necessary.
  • Heat throughly.
That's it! :)

Labels: ,

Sunday, July 05, 2009

American Toast (a patriotic version of French toast)


4 points for 2 pieces (including berries, whipped topping and maple syrup!)

This is a lightened up version of French Toast. I'm calling it American Toast since yesterday was Independence Day! Pictured above are 2 pieces, which was my serving, but my instructions are for 3 slices. I made one piece for my little sous chef, Robin.

Ingredients:
  • 3 slices Newman's Own 100% whole wheat bread
  • 1 egg
  • 2 Tbs 1% milk
  • about 3/4 cups of strawberries/blueberries
  • about 1.5 Tbs pure maple syrup (I used 1 Tbs for my serving and I'm guessing 1/2 Tbs for Robin)
  • 1.5 Tbs whipped topping (not the healthies thing, but from the 4th of July celebration yesterday and it tasted really good. Plus, it's low in calories.)
Directions:
  • Heat skillet to medium hot.
  • Crack the egg into a bowl and mix completely with a fork.
  • Add the milk and mix (this thins out the egg to help save on calories/points).
  • Dip both sides of bread into the egg mixture and scrape off the excess. Place bread into the skillet. Depending on how large your skillet is, you may be able to cook more than one piece at a time.
  • Cook each piece of bread for a few minutes at a time, until each side is browned.
  • Remove toast to plate, add berries, syrup and whipped topping.*
  • Enjoy!!
*For two pieces, add 1/2 cup of berries, 1 Tbs syrup and 1 Tbs whipped topping. For one piece, add 1/4 cup berries, 1/2 tbs syrup and 1/2 Tbs whipped topping.


Labels: , , , ,

Saturday, July 04, 2009

Black Bean and Scrambled Egg Breakfast Tacos

1 taco = 2 points

I made this recipe just like the Black Bean Tacos, except I only used 1 Tbs of black beans, added half a scrambled egg and skipped the cheese. This was a very good and filling breakfast!

Labels: , ,

Friday, July 03, 2009

Black Bean Tacos

5 points for 3 tacos

I've been making these tacos all week loosely-based on a blog post my sister Carrie sent to me. I've finally perfected the technique for cooking the tortillas so that they don't break when you turn them over! I just made 3 of these for dinner, so I will give instructions on how to make 3. They are SO good and it is hard to believe how low in fat and calories they are. The beans and the corn tortillas make a complete protein. The dairy is also a complete protein in itself.

Ingredients:
  • 3 thin corn tortillas
  • 6 Tbs black beans, drained and rinsed
  • 2 Tbs salsa
  • 3 Tbs shredded lowfat cheese* (divided)
  • 1 Tbs light sour cream (divided)
  • Olive Oil spray (or Pam if you don't have an oil sprayer)
Directions:
  • Heat skillet to medium high.
  • Place black beans in a bowl, along with the salsa. Mash with a fork until well blended.
  • Lightly spray tortillas on each side with olive oil (or Pam) and place onto skillet. I have a large iron skillet and I was able to start one taco, then after I folded it over, I moved it to the side and was able to start on the next tortilla and so forth. By the end all 3 were folded over and cooking in the skillet at the same time.
  • While tortilla is cooking, scoop 1/3 of black bean mixture (about 2.5 Tbs) onto it. Spread the bean mixture to run the diameter of the tortilla, but slightly off center.
  • Using a spatula, fold the tortilla in half.
  • Scoot the taco to the side of your skillet and start the next tortilla.
  • Turn tacos over to cook the other side once the tortillas are getting a bit crispy** and is getting dark brown spots on them.
  • When the 2nd side is getting a bit crispy** and has dark brown spots, remove tacos onto a plate.
  • Add whatever you like to the tacos; I added some more salsa, 1 Tbs of cheese per taco and 1 tsp of light sour cream per taco. I didn't have any fresh lettuce or tomatoes, but that would have been really good in them.

*I used a sharp cheddar cheese made from goat milk from a local dairy; it has the same calories and fat as lowfat cow milk cheese. If you use regular cow milk shredded cheese, the points increase to 6. I'm not a huge fan of lowfat cow's milk cheese because it just doesn't seem to cook or taste the same. I'm willing to give up lower points for good cheese.

**These are not crispy corn tacos. The tortillas are still soft, but the outsides are a bit crispy/crunchy. I just wanted to clarify; if you were expecting an uber-crunchy taco like you might get at Taco Bell, you'd be disappointed. I love the consistency of these tacos. They don't fall apart when you eat them.

Labels: ,

Wednesday, July 01, 2009

Chickpea Salad Sandwiches (aka, Vegetarian Tuna Salad)

3.5 points for the entire sandwich (1.5 for the chickpea salad, 2 for the bread)

I had read somewhere several years ago that vegetarians can make a mock-tuna salad by using chickpeas (also called garbanzo beans or ceci beans) in place of the tuna fish. I never tried it until yesterday. I must say, this is a pretty good, quick lunch. I was bummed I didn't have any lettuce and tomato to complete the sandwich, but it was still good. Plus, the chickpeas aong with the whole wheat of the bread make a complete protein.

Ingredients (makes enough for 2 sandwiches)
  • 1/2 cup cooked chickpeas, drained
  • 1 Tbs light mayonaise
  • 1/4 tsp yellow mustard*
  • several dill pickle slices, chopped
  • squeeze of lemon juice
  • salt and pepper to taste
Directions
  • Place chickpeas in a bowl and mash with a fork. They don't need to be pureed by any means, but you might want to be sure that you hit each bean.
  • Add the rest of the ingredients and mix with the fork.
  • (I just realized that it would be easier to just throw all ingredients into a food processor until mixed.)
Again, this makes enough for 2 sandwiches. I ate the one pictured above yesterday and today made a wrap with a Flatout flatbread. I added zucchini slices to the wrap to bulk it up a bit.

Labels: , , ,

Friday, June 26, 2009

Green Salad with Mango -OR- What to do with a mango that is too tart to eat


I got some mangoes this week through my organic food co-op so I cut one up for Robin and me to eat. It was pretty tart, even for me, so I decided to just throw it on my green salad that I already had going. I added salsa and some salad spritz and wow, I couldn't believe how good this was! The sweet-tartness balanced very well with the spiciness of the salsa and the acidity of the salad spritz. Very good!!

Labels: ,

Sunday, June 21, 2009

Father's Day Oat and Flax pancakes

I made these pancakes for Father's Day. Well, I just happened to make them ON Father's Day before realizing it was Father's Day. LOL.

This recipe makes about 13 pancakes at 2 points a piece.

Ingredients:

  • 1 cup white flour
  • 1 cup rolled oats
  • 1 cup 2% milk
  • 3/4 cup water
  • 2 Tbs olive oil
  • 2 Tbs honey
  • 1/2 tsp baking soda
  • 1 tsp salt
  • 1/4 cup ground flax seed meal
Directions:
  • Combine dry ingredients in mixer.
  • Add wet ingredients until completely mixed.
  • Using a 1/4 cup measuring cup, scoop batter onto medium-hot pan.
  • Cook the 1st side a few minutes, until edges start to get dry and bubbles break through the top of the batter and start to pop.
  • Flip, and cook 2nd side a few more minutes.

Sunday, June 14, 2009

Grilled Portobello (Portabella) Mushroom Burgers


Grilled Portobello (Portabella) Mushroom Burgers
6 points

I made these a few nights ago during a visit to my parents' house. I don't have an outside grill of my own (I don't grill a lot and the small amount I do grill, I can do on my cast iron grill pan on the stove), but my parents do. My dad fired up his small grill for these absolutely DELISH burgers. The points from these come from the cheese (I think 3 points per slice) and the hamburger bun (also 3 points, if I remember correctly). We served these with yellow squash that was sliced and sauteed with a small amount of butter, olive oil, fresh onion slices and garlic powder.

These burgers were SO GOOD.

Ingredients:
  • Portobello (portabella) mushrooms - one for each burger
  • Newman's Own Light Balsamic Vinaigrette dressing* (I used about 1/4 cup for 2 mushrooms with a bit left over)
  • 1 - 2 tsp dry thyme
  • 1 tsp garlic powder
  • 1 - 2 tsp dried onion flakes
  • Slices of cheese (I used muenster)
  • hamburger buns
  • hamburger condiments and garnishments, as desired (e.g., mustard, mayo, lettuce, tomatoes, pickles).
Directions:
  • Prepare your grill for cooking.
  • Clean mushrooms by wiping them lightly with a damp towel. You just want to get the dirt off without damaging the mushroom. Avoid using water because it could reduce the flavor of the mushroom. (See this reference: http://www.recipetips.com/glossary-term/t--33854/portobello-mushroom.asp).
  • Mix the Balsamic vinaigrette dressing, thyme, garlic powder and onion flakes in a bowl.
  • Brush the tops and bottoms of the mushrooms with the dressing mixture.
  • Grill the mushrooms about 5 - 7 minutes on each side.
  • Add the sliced cheese to each mushroom and cook until just melted (only about a minute or two).
  • Place mushroom on hamburger bun and garnish as desired.
  • Enjoy!
*If you don't have balsamic vinaigrette dressing, you can mix about 1/4 cup of balsamic vinegar with about 2 tsp olive oil, the above spices and salt for the marinade.


Labels: , , ,

Saturday, May 30, 2009

Egg Salad Sandwich


Egg Salad Sandwich 3.5 Weight Watchers Points

My mom made egg salad sandwiches a couple of weeks ago while we were visiting and I now have a new favorite sandwich!!

I hard boiled some eggs earlier this week so that they'd be ready for whenever I needed them.  Yesterday, I grabbed two to put into Robin's and my brown bag lunch we took to the zoo.  

Anyway, I just made an egg salad sandwich for myself for lunch today.  It was so good!

Ingredients:
  • one small hard boiled egg
  • 1 Tbs Hellmann's Light Mayo, divided
  • 1 tsp yellow mustard
  • several dill pickle slices, diced
  • 2 pieces Nature's Own 100% whole wheat bread
  • paprika
  • black pepper
Directions
  • grate the egg into a bowl (this is easier said than done!)
  • Add 2/3 Tbs of the mayo (2 teaspoons), mustard, and diced pickles.
  • Use remaining teaspoon of mayo to spread onto the bread slices
  • spread the egg salad onto one of the bread slices
  • sprinkle egg salad with paprika and black pepper
  • close sandwich, cut in half if desired and eat!
This is such an easy, delicious, filling sandwich if you already have the eggs boiled and cold.  I was really able to get the points down without sacrificing taste by using a small egg, which are 1 point each.  The package indicated "medium" eggs, but they are very small and onl 50 calories each.  Even with the amount of fat (I can't remember how much off the top of my head, probably around 3 or 4 grams), they still come out to 1 point.  This was well enough egg for one sandwich!

I also used the reduced fat mayo (I just can't bring myself to use fat free mayo; it's just wrong), which is half the fat and calories of regular mayo.  The mustard, pickles, paprika and pepper are 0 points, but add a lot to the flavor.  And the Nature's Own 100% whole wheat bread is 1.5 points for 2 slices.

I bet this would be good with some lettuce and tomato, which I have in the fridge, but I wanted to taste the pure egg salad the first time.  I'm glad I did!

Labels:

Wednesday, May 27, 2009

Protein Packed Salad


4 Weight Watchers Points

I'm eating this delicious salad I created for lunch today as I type this post.  I was at the local health food store today and found a new local goat cheese!! I was so excited.  The goats were milked and the cheese was made about 100 miles from where I live.  The cheese is from Pure Prairie Creamery.  This creamery offers several flavors of cheese; I chose the sharp white cheddar.  It is incredible, to say the least.  Oh, and it is naturally low fat.  It has about the same nutritional information as another (non-local) brand of reduced-fat organic cow milk cheese that I sometimes get.

For my protein packed salad, I used the following ingredients:
  • Chopped romaine lettuce (about a cup or two)
  • Sliced and quartered cucumber
  • Diced fresh tomatoes
  • 1 oz sharp white goat cheddar cheese, shredded
  • One medium hard boiled egg, chopped
  • 1 tsp flaxseed meal
  • Several sprays of Newman's Own Natural Salad Mist - Balsamic flavor
I just layered the ingredients into a bowl in the order above, sprayed with the Salad Mist (I was so excited there is another option now besides the Wishbone Salad Mist which is almost completly HFCS - aka the devil), and added a dash of salt and pepper.

This is a very satisfying, healthy, low points lunch!

Labels: , ,

Monday, May 25, 2009

16 Bean Soup made in the Crock Pot

It's been years since I've made dry beans in a Crock Pot, so to refresh my memory, I Googled and found a really neat blog with some great instructions: A Year of CrockPotting: Cooking Dried Beans in the CrockPot.

Basing my technique on this blog's instructions, I rinsed a 1 pound bag of 16 bean soup in a collendar last night and picked out any beans that looked shrivled, cracked or just looked yucky.  I placed the beans in the crock and added enough water to cover the beans plus about 2" of water.  I scooped out any beans that floated to the top, then I just covered the crock with the lid and left the beans on the counter to soak overnight.

This morning at about 10am, I poured off the soak water and added fresh water, again enough to cover the beans plus 2" of water.  I turned the Crock Pot on high and left the beans to cook.  I checked on them about 4pm (so, 6 hours of cooking on high) and they were very soft.  At this point, I added spices since I've read that adding spices before the beans cook through will keep the beans from softening.  Instead of using the packet that comes with the 16 bean soup mix, I use my own spices.  I added the following spices.  The measurements are approximations, since I cook by taste.

  • 1/2 tsp garlic powder
  • 1 tsp ground cumin
  • 2 Tbs chili powder
  • 1/2 tsp dried oregano
  • dash or two of salt
  • dash or two of pepper
I wish I would have added the spices earlier than I did.  If I hadn't been napping, I might have checked on the beans around 2pm and added the spices then.  Don't get me wrong: the beans were so delicious, but I think the spices could have infused the beans better if they had been in longer.

I was worried that the liquid would be too watery, but it was pretty thick.  I might add less water next time as I like my bean liquid very thick.  Thick enough to spread the "soup" on a cracker, if one were so inclined.

I dashed some Tabasco Chipotle sauce on top of the beans and added a bit of shredded cheese. Yum, they were so very good!!

Sunday, May 24, 2009

My new Crock Pot!

My New Crock Pot!
Isn't she beautiful??  I'm so excited about my new Crock Pot!  I have been wanting to buy one for God-knows-how-long and I was shopping for random stuff at Target this past week and found a display of several different small kitchen appliances on sale for $18.99, including a 5 quart stainless steel and black Crock Pot! That sure found its way into my cart in a hurry!  The regular price is $24.99 and according to Target's website, it is still on sale. http://www.target.com/dp/B001DIXFAA/sr=1-10/qid=1243217129/ref=sr_1_10/188-5306395-9833241?ie=UTF8&frombrowse=0&index=target&rh=k:crock%20pot&page=1

My mother-in-law bought a Crock Pot for me several years ago, but it has gotten lost in one of our many moves.  I've been meaning to replace it, but I just haven't gotten around to it.  I love that the stainless and black of this one matches the rest of my kitchen appliances, both large and small.  Except for my boring white KitchenAid mixer.  That's next on my list to replace.  I'll either get black or red, for a pop of color.

Anyway, I'm soaking a package of dry 16 bean soup overnight tonight and will start the Crock Pot in the morning.  The technique I'm using I found on a super cool blog, A Year of CrockPotting: Cooking Dried Beans in the CrockPot. I can't wait to see how they turn out!

Labels: , ,

Monday, May 04, 2009

Roasted Cauliflower

Roasted Cauliflower


This is a delicious, low fat/low carb way to make boring ol' cauliflower.  You may have seen "Cauliflower Popcorn" recipes in magazines such as Weight Watchers and the like.  I've made the "popcorn" before, but we prefer a bigger cauliflower floret, so that it's not as crunchy and dry.  The result is a moist side dish with a wonderful roasted flavor.

Ingredients
  • One head of cauliflower
  • 3 Tbs olive oil
  • chili powder to taste
  • garlic powder to taste
  • Italian seasoning to taste
  • pinch or two of sea salt
Directions
  • Preheat oven to 450F
  • Cut away the long stalk and break cauliflower into medium sized florets
  • To wash, place florets into sink or big bowl of water + 15 drops of Grapefruit Seed Extract. If you don't have GSE, a bit of vinegar will do the trick.
  • Place cauliflower in a bowl
  • Add the olive oil, chili powder, garlic powder, Italian seasoning and sea salt*
  • Toss with fingers to coat
  • Place on baking pan in oven
  • Bake for about 15 minutes, turn florets over, then bake 15 more minutes
*I never measure my seasonings. I just add what looks to be right and taste. If it needs more, then I add more.  If it needs less, well, I'm kinda screwed. ;)

Monday, April 06, 2009

Grilled Vegetable and Hummus Wrap

Grilled Vegatable and Hummus Wrap

I'm actually eating this for dinner as I type this post. I had some veggies from my organic co-op in the fridge that needed to be used up, so I decided to grill them on my grill pan and make wrap sandwiches.


Ingredients I used:


asparagus
sweet peppers (cut into strips)
zucchini (cut on the bias)
Newman's Own Basalmic Vinagarette dressing
dried thyme
sea salt
romaine lettuce
tomato (sliced)
mayo
hummus
fresh lemon juice


Directions:


While I was heating the grill pan, I poured a small amount of Newman's Own Basalmic Vinagarette dressing over the asparagus, sweet peppers and zucchini. I added dried thyme and pinch of sea salt, then tossed to coat.


Once the pan was hot, I grilled the vegetables until they were al dente (several minutes on each side).

To serve, I spread mayonaise and hummus on a FlatOut flat bread. Then I added some of the grilled vegetables, some romaine lettuce and sliced tomato. A small squeeze of lemon, some sea salt and a dash of pepper finished off the wrap. Then, I just rolled it and cut it in half.


Very delicious! A wonderful lunch or dinner for summertime. (However, even though it is April, tonight's forecast calls for a hard freeze with a low of 25, LOL).

Tuesday, February 10, 2009

Easy creamy tomato pasta sauce

OK, so this really isn't a recipe, but more like a quick tip.

Jeff went grocery shopping this past weekend and accidentally bought Horizon Plain Whole Milk yogurt, rather than the vanilla he usually buys. If you've never had plain yogurt, it tastes like sour cream.

So, I am looking at this big tub of plain yogurt wondering what the heck I'm going to do with it. Then, last night, I was making a quick pasta dinner with (non-homemade) Newman's Own organic tomato basil pasta sauce and organic whole wheat pasta. I had an idea! What if I mixed some of the yogurt into the sauce for a creamy tomato sauce?? I scooped a little of the pasta sauce out, then added some yogurt and mixed. The result was a fabulously gorgeous and wonderfully delicious creamy tomato pasta sauce!!

I knew Jeff wouldn't touch this concoction with a ten foot pole wearing surgical gloves, so I didn't mix the yogurt into the whole pot of sauce. I just added a scoop (about 1 tablespoon) of yogurt to Robin's and my servings after portioning them out. It did cool off the sauce a bit, but that was fine with me.

I couldn't get enough of this creamy tomato-y sauce!! I loved it and so did Robin, my little 2 year old who eats like a bird (pun intended).

Just thought I'd pass this little tip along. :)

Labels: ,

Sunday, November 09, 2008

Homemade Lara bar!

Homemade Chocolate Coconut Almond Oat Lara bar
(It sort of looks like poop on a plate, sorry!)

One bar is 3 Weight Watcher's points.  Below is the Nutrition Facts label.


So, taking bunnyfoot's formula, I created my own combination.  My Lara Bar is an almond, oat, coconut, chocolate mix.  All raw ingredients (is cocoa powder raw?)!  These were so easy to make!!  I think I'm going to call these Home Bars.

Here's how I did it.  I made 7 bars from the ingredients below:

Ingredients
  • 7 dried date, pitted
  • 35 raw almonds
  • 7 Tablespoons rolled oats
  • 7 Tablespoons shredded coconut
  • 3 and 1/2 teaspoons powdered unsweetened cocoa
Directions
  • Place all ingredients in food processor and process until all ingredients start to form a sort of dough.  This doesn't take long at all.
  • Roll the dough into a ball and begin to shape into a flat disk.
  • Place into Ziploc bag and form into a rectangle with a uniform thickness.
  • Place in refrigerator for a couple of hours.
  • Cut into 7 bars.
There's nothing magical about the number 7; that's just all the dates I had left and I figured one date per bar.  The bunnyfoot recipe called for 1 Tablespoon pureed dates and 3 Tablespoons of dried ingredients.  One pureed date is about equal to 1 Tablespoon.

Each Home Bar cost about $0.52.  What do Lara bars cost at the store?  At least a dollar each?

I use a KitchenAid food processor and I didn't have to puree the date before adding the dry ingredients.  Here are pics... taken with my awesome new G1 phone from T-mobile!!


All of my gorgeous raw ingredients, just waiting to whirl around together


About halfway through processing


The ingredients are all stuck together... time to play! ;)


A big ball of Home Bar


All shaped and ready to refrigerate!  (Goodness, it looks like hamburger meat; gross!)


Labels: , , , , ,

Sunday, October 12, 2008

Wasa Bread Pizzas!

Wasa Bread Pizzas
2 points each


Wasa bread is my new BFF.   Wasa is a really crispy (aka, hard) flat bread.  It is about the size of maybe two regular saltines next to each other, but thicker.  It is low in points and high in whole grains and fiber.  I just realized I ate Wasa for all 3 meals today, .

Tonight, I made Wasa Bread Pizzas for dinner.  They were 2 points each and I had 2 of them.  They turned out great!  I wasn't sure if the Wasa bread would get really soggy from the spaghetti sauce; luckily it didn't.

They were super easy to make.  Here's what I did:

  • Preheat oven to 425.
  • Turn 2 Wasa breads upside down on a cooking sheet.  The tops of the Wasa breads have lots of nooks and crannies; the bottoms are flatter and easier to spread stuff on.
  • Spread 1 tablespoon of spaghetti sauce on each bread.
  • Sprinkle 1/2 oz of shredded cheese on each bread.
  • Bake at 425 for about 3 or 4 minutes.
  • Enjoy!
That's it!  The most time consuming part was shredding the cheese, but if you buy pre-shredded cheese (it is more expensive than block cheese) then it would be even faster.


Saturday, October 04, 2008

What to do with leftover rice?? Hot rice cereal for breakfast!!

The other night I made some brown rice to go with a thick bean soup I made.  Well, I made WAY too much rice.  I hate to waste food, so I had to figure out what to do with the leftover rice.  I thought that I could make it like oatmeal for breakfast!  It turned out really yummy!

Here's the nutrition data:
Ingredients:
  • 1/2 cup cooked brown rice
  • About 2 Tbs whole milk
  • Very thin pat of butter
  • 1 tsp blueberry preserves
  • 1 tsp peanut butter
  • 1 tsp flax seed meal
Directions

Combine rice and milk in bowl.  Add butter and reheat until heated through.  Add jelly, peanut butter and flax seed meal.

Really good and filling!  Of course, you can add whatever you like to it, I just happen to like PB&J in my oatmeal.  :)

Friday, August 22, 2008

Quinoa with Black Beans


Quinoa with Black Beans
4 points per 1 cup serving

OMG I can't believe I haven't included this recipe yet?? Wha.....? I make this a lot and it is really good. I made it tonight for my in-laws and they liked it as well.
I "Hollified" this recipe quite a bit from http://www.allrecipes.com/. Here's how I made it tonight.
Ingredients
  • 1 Tablespoon olive oil
  • 1 small onion diced
  • 1 medium carrot shredded (sometimes I add this, sometimes not)
  • 1.5 cups uncooked quinoa
  • 3 cups water
  • 2 tsp chili powder
  • 1 tsp cumin
  • 1/2 tsp garlic powder (sometimes I add fresh diced garlic - about 2-4 cloves - instead)
  • About 3 cups cooked black beans (about 2 cans)
  • 1/2 large can of diced or crushed tomatoes (about 1 15oz can)

Directions

  • Heat olive oil in non-stick skillet
  • Saute onion and carrot until soft
  • Add water and bring to a boil
  • Add quinoa, chili powder, cumin and garlic powder and stir through
  • Bring water back to a boil, and reduce heat to low
  • Cook 20 minutes, stirring occasionally
  • Add black beans and diced tomatoes, stir through
  • Cook until heated through completely

This is a larger batch than I normally make. I typically will make this with just one cup of uncooked quinoa. Sometimes I use one can of black beans, sometimes two. It just depends on what I have in the pantry. As I mentioned in one of my previous posts this week, I made a pound of dry beans earlier this week, so I just used 3 cups of those beans, which is equal to about 2 regular cans of beans.

As I was typing this, I realized that I didn't top the quinoa with avocado tonight! That is the whole reason I made quinoa because I had several avocados that need to be used. Darn!! Anyway, it is really good with avocado.

Also, Jeff likes to make a wrap out of his. He puts a big scoop onto a large tortilla, adds cheese and salsa and wraps it up. Yum.

This larger batch made 7 cups total. I figure 1 cup is good (generous) serving size. Check out the Nutrition Facts below. Not bad!! Though, I am disappointed in the protein rating that NutritionData.com provided for this recipe. I always have heard that quinoa is a complete protein by itself, yet even with the beans, ND.com rated this only a 50. 100 or more is considered to be a complete protein. Hmmmm??? I'll have to research.


Labels: ,

Tuesday, August 19, 2008

Black Bean Salad - a quick lunch

Black Bean Salad
6 points

I made a big pot of black beans and a green salad last night. I was craving something cool and crisp after working out at a spin class (my first one ever... it kicked my buttox), so I whipped up this delish lunch with my leftovers:


Ingredients:


  • About 2 cups of green salad (mine consisted of green leaf lettuce, cucumbers and tomatoes)

  • 1/4 cup black beans

  • About .5 oz shredded cheddar cheese

  • 1/4 avocado

  • About 1 Tablespoon ranch dressing


Directions:


  • Place salad in a bowl and top with beans, cheese, avocado and dressing. Add S&P to taste.


If I had lemon juice, I would have added that. Also, I really wanted to add salsa to the top, but I'm out of that too. (Can you tell I need to go grocery shopping?)


Here is the nutritional info. It looks a little scary, but it is only 6 Weight Watchers points. Plus, the NutritionData.com website indicated that it has a protein score of 112... which is great because anything over 100 is a complete/high quality protein. I'm always looking for complete protein meals! Yay!

So, being a complete protein hopefully this will stick with me through the afternoon. It might even get me through my 4pm crash.


Monday, August 18, 2008

Notice my new name?

I thought "Holly's Food Blog" sounded.... well... blah.

So, now, I'm "Delicious/Nutritious: Healthy vegetarian recipes." The Delicious/Nutritious part comes from a song I made up a long time ago, when Robin was eating purees. I'd sing as I was trying to get her to eat something:

It's so delicious, and very nutritious! It's so very very nutritious for you!!

The song has sort of a march feel to it.

Anyway, since then, I always say something is "Delicious/Nutritious". And I found out this past weekend that my older sister, Amy, says the same thing. Weird.

Satisfying afternoon snack: Wasa bread, cream cheese, avocado and more

Yummy!!

I needed a quick, filling afternoon snack, so I spread some cream cheese (full fat, ugh, since my closest grocery store doesn't have low fat organic cream cheese) onto a Wasa bread. Then, I mashed 1/4 of an avocado on top, added two slices of tomato. Hit it with a squeeze or two of lemon juice, sprinkle with garlic powder, salt and pepper and you have a creamy, crunchy, tangy absolutely yummy afternoon treat!


The only problem with this is, you eat it way too fast. And you want more. But, take a gander at the Nutrition Facts (courtesy of my new internet BFF, http://www.nutritiondata.com/) and you'll see why I stopped at just one.

Super cool new e-tool!! NutritionData.com

I discovered a really cool website for building recipes and getting nutritional information. I think you can track what you eat as well. Anyway, it is really awesome. It has a slight learning curve, but lookee what I can now put on my blog posts!!


I built a recipe on the website for a snack I had this afternoon (I'll blog about that in a minute) and this is the Nutrition Facts box that popped up. It also has tons of other nutritional information.


So, look around and have fun! Oh, and best of all, it is free. My kind of website. ;)


Wednesday, August 13, 2008

Kale and Bean Soup

Kale and Bean Soup


I found a recipe for Bean Soup with Kale on http://www.allrecipes.com/ and "Hollified" it. A lot.

Ingredients:
  • EVOO
  • 4 cloves of garlic, chopped
  • 1 medium onion, chopped
  • 1 bunch of kale, chopped with long stalks removed all the way through the end of the leaf)
  • 4 cups vegetable broth
  • 2 - 15oz cans kidney beans (drained)
  • 1/2 big can of diced tomatoes (about 1.5 cups)
  • 2 - 3 tsp Italian seasoning
  • 2 - 3 tsp dry thyme
  • Salt and pepper to taste
  • 1 medium potato - diced
  • 4 large carrots - sliced


Directions:
  • Spray large pot with EVOO and heat.
  • Saute garlic and onion until soft.
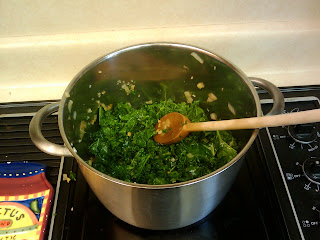
  • Add kale and saute until wilted (see photo below).
  • Add broth. At this point, I used my immersion blender to chop the kale even smaller (see photo below).
  • Add carrots, potato, Italian seasoning, thyme, canned tomatoes, and salt & pepper.
  • Simmer about 15 minutes or until carrots and potatoes are getting soft.
  • Add beans and simmer until heated through.

Labels: , , ,

Tuesday, August 05, 2008

Sauerkraut: I do believe it was a success!!

After a couple of weeks of fermenting, I noticed that there was in fact "scum" on the surface of my brine. I had previously thought that certainly, not MY sauerkraut would develop scum!!

According to Sandor Ellix Katz (aka, "Sandorkraut"), creator of the Wild Fermentation website (www.wildfermentation.com) and the author of Wild Fermentation: The Flavor, Nutrition, and Craft of Live-Culture Foods (Chelsea Green, 2003):

Sometimes mold appears on the surface. Many books refer to this mold as “scum,” but I prefer to think of it as a bloom. Skim what you can off of the surface; it will break up and you will probably not be able to remove all of it. Don’t worry about this. It’s just a surface phenomenon, a result of contact with the air. The kraut itself is under the anaerobic protection of the brine.

OK, so if "Sandorkraut" thinks it is OK, then allright, I'll give the scum a chance. (Sounds like a lesser-known John Lennon B-side song "Give Scum a Chance").

So, I left the sauerkraut alone. I didn't taste it every day or two like Sandorkraut said to do. I was a bit afraid of the scum and afraid of my experiment being a failure!

But, alas, I decided tonight to check it out. I pulled off the cover and all of the scum pulled up with it! None remained on the kraut.

I tasted it.

Oh my.

I've never had real fresh sauerkraut. And it is delicious! I think it is a success!

I put it all in a gallon ziploc bag (for lack of a better storage container) and put it in the fridge. Now, we need some vegetarian brats to make a yummy kraut and sausage sandwich!

I'll have pics later!

Tuesday, July 01, 2008

Sauerkraut: An experiment in fermentation

I love sauerkraut. So, when my organic food co-op had extra heads of cabbage last week, I grabbed a couple of extra to try to make some at home.

I did a bit of research a few weeks ago and to my surprise, sauerkraut isn't pickled as I originally thought, but it is fermented in brine. (Don't tell my husband's German family that I didn't know that!!)

I've never fermented anything. Well, I take that back... I've never successfully fermented anything. I tried several years ago to make a sourdough starter, aptly named "Fermie" but it was a failure. I don't even remember what happened; I must have blocked the trauma out of my memory.

Anyway, so this will be an experiment and a somewhat long-term one at that since it takes a few weeks for the cabbage to fully ferment.

I found a neat website - Wild Fermentation - and used their sauerkraut recipe as a base for my kraut.

Here's what I did:

I shredded one head of cabbage and put it into some Grapefruit Seed Extact water in the sink to clean it.

Then, I washed a glass bowl (the original recipe says to use a crock or a food grade plastic bucket, neither of which I have). To sanitize the bowl (fermentation freaks me out a little, honestly), I poured in some boiling water and dumped it out.

I put the cabbage in my salad spinner to spin the water out, then put a layered it into a plastic bowl. I sprinkled sea salt after each layer. I also threw in some black peppercorns for funzies. After all of the cabbage was layered in, I mixed it all with my fingers.

Then, a little at a time, I put the sauerkraut into my glass bowl. I tamped each layer with my hands to pack it down tight. This helps draw the water out of the cabbage.


I put a plate on top of the cabbage, then put on my weight - a glass jar filled with water.

I covered it with two towels (to make sure all sides of the bowl were covered) and placed it in a corner of my kitchen. I was surprised (yet again!) that it didn't go in the fridge.


I'm supposed to press down on the plate every couple of hours until the water covers the plate. Then, I'm supposed to check it (i.e., taste it) every day or two. When it tastes good, it's ready!


Labels: , , ,

Tuesday, June 24, 2008

Hummus pita pocket sandwich

I'm eating this right now! I think it is probably about 5 points for the total sandwich.


I bought some dry hummus mix in the bulk bin from our health food store the other day and while it tastes pretty good, it definitely isn't as good as store bought or homemade hummus. But it is really cool to whip up a little bit of hummus quickly.


So, for today's lunch, I mixed 2 tablespoons of dry hummus mix with 1/4 cup of water (that is a 1:2 ratio; hummus to water).


I cut a whole wheat pita in half to form two pockets and spread the hummus into each pocket. Then, I stuffed each half with leftover salad from last night (romaine, tomatoes and cucumbers). I put a tiny bit of ranch dressing (to satisfy my ranch tooth, lmao) then shredded some white cheddar on top. I'm eating it with a handful of pretzels. YUMMY!


PS: This would be perfect with feta cheese. But the cheddar is pretty dang good anyway.

Thursday, May 29, 2008

Even Quicker Tortilla Pizzas!

Sorry, no pic. I think these are probably around 3 points each as well.

Last night, we had some left over spaghetti, but not enough to make a meal out of, so I threw together some quick pizzas. I didn't have any pita bread (or Flat Out flat bread which is also good for a quick pizza), so I eyed the whole wheat tortillas in the fridge and thought... hmmm... that might just make a good pizza crust! Man were they ever good. I liked them better than the pita pizzas we made the other night.

Just throw some spaghetti sauce on the tortilla, shred some cheese over, bake at 425 for about 5 mins (again, keep an eye on them every minute or two) and voila! quick and easy pizza.

Friday, May 23, 2008

Quick Pita Pizzas

I whipped up a quick Friday night dinner by making quick pita pizzas. I think these are about 3 points each!

Ingredients
  • Pita bread
  • Spaghetti Sauce
  • Cheese (I used shredded cheddar, but use whatever you like)

Directions

  • Preheat oven to 425
  • Split the pita bread horizontally so that you get two round pieces - one top and one bottom
  • Spread spaghetti sauce on the pita bread
  • Sprinkle with cheese
  • Bake for about 10 minutes. Keep checking to make sure it isn't getting overdone. The cheese should be bubbly and getting a little brown but not too brown.

Saturday, May 17, 2008

Tofu and Veggie Stir Fry

We recently joined an organic produce co-op and I discovered that a stir-fry will use up a lot of vegetables!! I also discovered a delicious all-natural Teriaki Sauce - Soy Vay. It is so good!! I has sesame seeds as well as actual pieces of ginger and garlic. Here's a pic and a link: http://www.soyvay.com/index.php?main_page=page&id=23&chapter=0&zenid=2ee7c41367e2df9eb995758e47a80a62

Here's my recipe. I just use whatever stir-fry worthy veggies I have on hand. This is what I used last time:
Ingredients
  • 1 cup of brown rice (or other grain such as quinoa)
  • 2 carrots, sliced on the bias
  • 1/2 head cabbage
  • 2 zucchini, sliced
  • 2 stalks of celery, sliced
  • 1 bunch of broccoli, chopped
  • 1/2 onion, sliced
  • 1 pound firm or extra firm tofu
  • Soy sauce
  • 1/2 bottle of Soy Vay (about 1 1/4 cups) - make sure it is well mixed

Directions

  • Start cooking your grain according to package directions. I used quinoa the last time I made this and it was really good!
  • Preheat oven 350 degrees
  • Cut tofu into pieces of the desired size you like. We like ours super thin, so I cut the tofu into 64 pieces. I cut the tofu into sixteenths, then each sixteenth is cut into 4 pieces.
  • Spray baking tray with oil
  • Arrange tofu in a single layer
  • Drizzle with soy sauce and brush to cover.
  • Spray with oil
  • Turn tofu pieces over and brush again as needed
  • Spray again
  • Bake about 15-20 minutes
  • While tofu is baking cook the stir fry. Spray the skillet with oil and heat on medium heat.
  • Pour a bit of Soy Vay in the skillet (about 1/4 cup or so)
  • Add broccoli, carrots and celery (or whatever veggies you are using that will take longer to cook).
  • Stir to cover veggies with Soy Vay.
  • Let cook a few minutes (5? 10?) until they start getting a little soft.
  • Add zucchini and onion and the remainder of the Soy Vay, stir to completely combine and let cook a few more minutes.
  • Add cabbage, stir and cook another 5 mins.
  • Add tofu and stir and cook a few more minutes.

Serve with cooked grain. Delish!!

Wednesday, May 14, 2008

Misto oil sprayer

We recently bought a Misto oil sprayer rather than continuing to buy Pam. I love it!! It uses air to propel the oil, so you aren't eating all of the additives that Pam has!! All you do is fill up the sprayer halfway (the air needs room), pump the lid up and down about 10-15 times and spray. Easy! Healthy! Cheaper than Pam!!

The sprayer was $10 at Bed, Bath and Beyond. That's about 3 cans of Pam, I guess. Then, of course, you have to figure in the cost of the oil. It uses 3oz of oil. The organic EVOO I get is about $6 for 17 oz; about $0.35 an ounce. So it is about $1 to fill the thing up. It uses up quicker than a can of Pam, but, seriously, this thing will pay for itself very shortly!

Here's a picture and a link: http://www.misto.com/